Terry
Active member
This procedure is for the 355 and Jason (candellara) will post the extra/different actions for the 348.
1. In order to gain a little more clearance in the corners of the dash to aid removal.
a. Remove sunshades
b. Remove upper windscreen surround trim (overlaps with windscreen side trim).
c. Remove left and right windscreen/door trims.
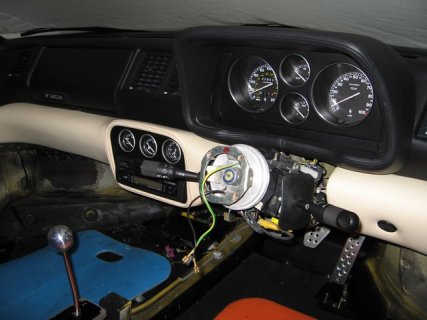
d. Remove the steering wheel, much easier with this out of the way.
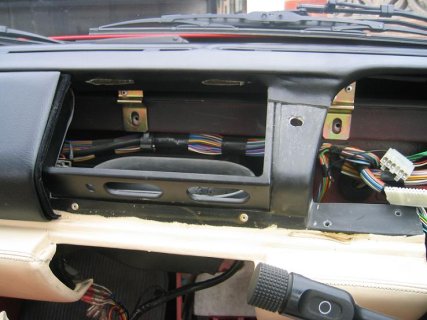
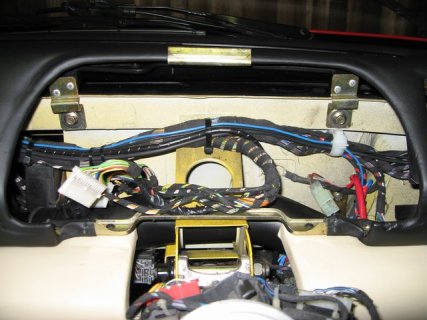
2. Remove centre instrument binnacle via two screws on lower frame. All the electrical connectors are different so no need to identify.
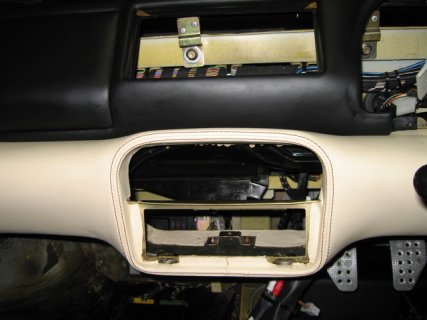
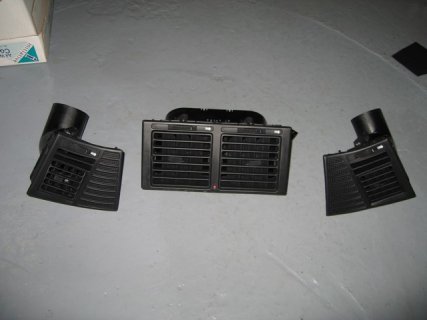
3. With access through the instrument binnacle, remove right and centre air vents.
4. From below and above, remove left vent.
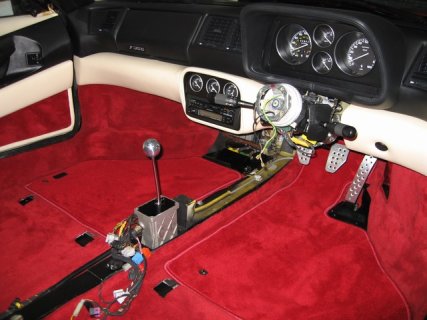
5. Remove radio and centre instruments. This makes the dash easier and lighter to handle.
6. Disconnect electrical plugs, 2ea left side (tweeter and glove box light) and 2ea right side (tweeter and temp sensor).
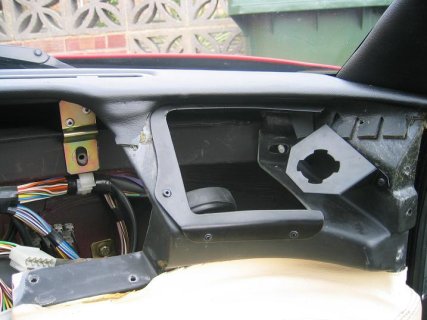
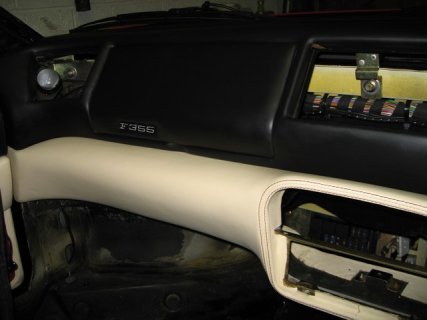
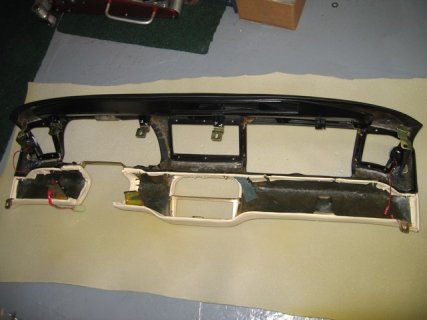
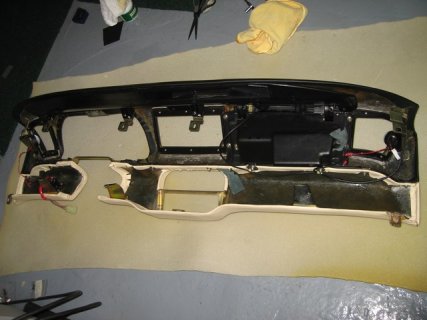
7. Remove six upper dash attachment bolts (10mm socket) and five lower attachments, cross head self tapers.
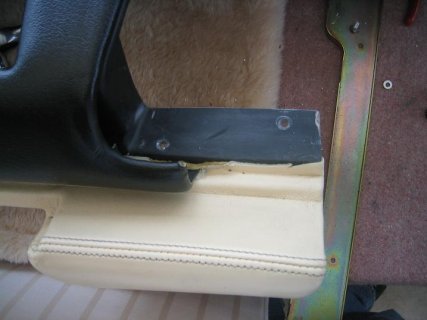
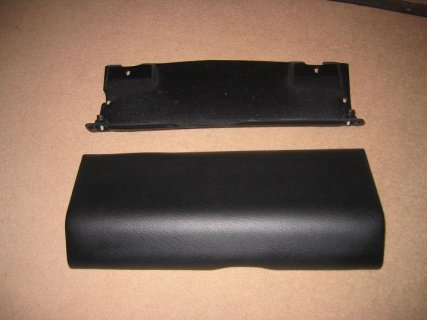
8. In the centre of the dash below the instrument binnacle are two rivets securing the edges of the two lower dash trims. Drill out the right hand rivet to facilitate removal of the right hand lower dash trim.
9. The dash should now be free to pull rearward and pop out of the two outboard fixing studs. Pull back about 100mm just enough to gain access to the two nuts securing the right lower dash trim. Remove these two nuts and the small right hand lower dash trim can then be removed. I did this to provide greater clearance when removing the dash and to reduce the risk of damage to the leather,
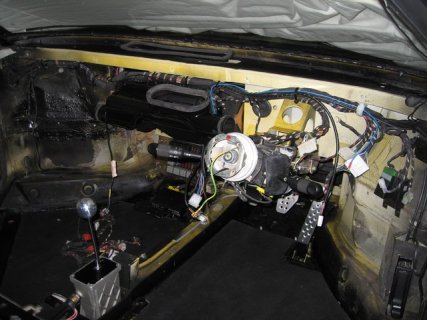
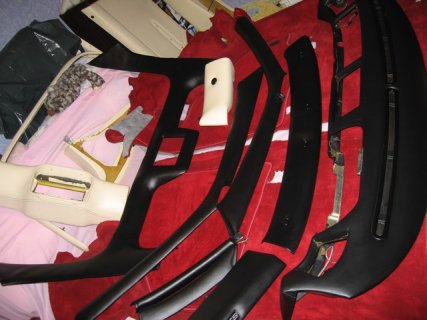
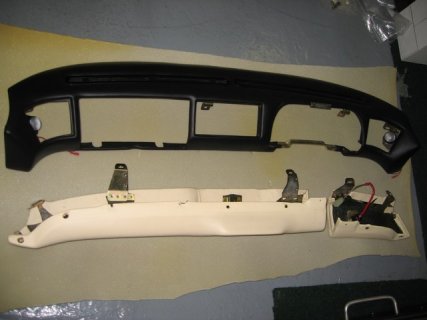
10. Lift out dash.
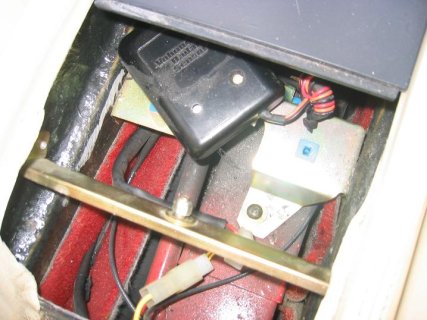
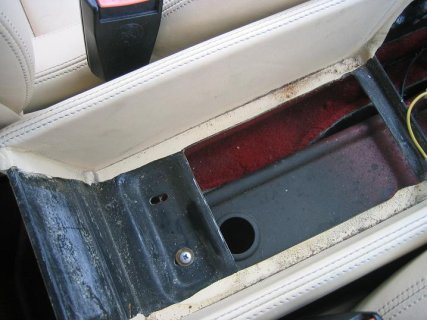
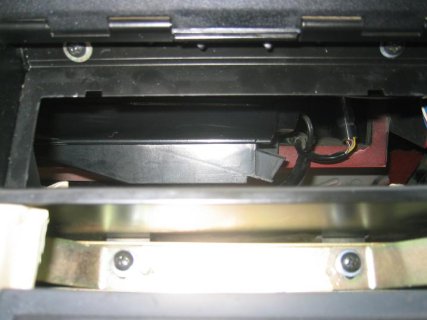
With the dash out, it is a good opportunity to clean the lower windscreen and the forward portion of the dash. Air vents can be washed and the glove box disassembled for a good clean. I used Woolite to clean inside the glove box. I tried a variety of leather cleaners but all still left the tide mark on the dash from previous cleaning. I then used Connelly Hide Food which really does a superb job and removed any traces of previous cleaning. After applying Hide Food remove any surplus with a micro fibre cloth for an original finish. Any aftermarket wiring for audio or alarm can now be correctly routed and tied with good access. I also upgraded the speakers and hid away the crossover behind the dash. I will post these details in a separate post.
Re-installation is a reverse of the above. I drilled out both the rivets below the instrument binnacle and replaced with self tappers, much easier for future access. The leather needs peeling back behind the rivets to avoid any mess during drilling then re-gluing afterwards.
I have included a number of pictures which should be self explanatory. Ill be happy to add any clarifications and I’m sure Jason will add his part shortly.
1. In order to gain a little more clearance in the corners of the dash to aid removal.
a. Remove sunshades
b. Remove upper windscreen surround trim (overlaps with windscreen side trim).
c. Remove left and right windscreen/door trims.
d. Remove the steering wheel, much easier with this out of the way.
2. Remove centre instrument binnacle via two screws on lower frame. All the electrical connectors are different so no need to identify.
3. With access through the instrument binnacle, remove right and centre air vents.
4. From below and above, remove left vent.
5. Remove radio and centre instruments. This makes the dash easier and lighter to handle.
6. Disconnect electrical plugs, 2ea left side (tweeter and glove box light) and 2ea right side (tweeter and temp sensor).
7. Remove six upper dash attachment bolts (10mm socket) and five lower attachments, cross head self tapers.
8. In the centre of the dash below the instrument binnacle are two rivets securing the edges of the two lower dash trims. Drill out the right hand rivet to facilitate removal of the right hand lower dash trim.
9. The dash should now be free to pull rearward and pop out of the two outboard fixing studs. Pull back about 100mm just enough to gain access to the two nuts securing the right lower dash trim. Remove these two nuts and the small right hand lower dash trim can then be removed. I did this to provide greater clearance when removing the dash and to reduce the risk of damage to the leather,
10. Lift out dash.
With the dash out, it is a good opportunity to clean the lower windscreen and the forward portion of the dash. Air vents can be washed and the glove box disassembled for a good clean. I used Woolite to clean inside the glove box. I tried a variety of leather cleaners but all still left the tide mark on the dash from previous cleaning. I then used Connelly Hide Food which really does a superb job and removed any traces of previous cleaning. After applying Hide Food remove any surplus with a micro fibre cloth for an original finish. Any aftermarket wiring for audio or alarm can now be correctly routed and tied with good access. I also upgraded the speakers and hid away the crossover behind the dash. I will post these details in a separate post.
Re-installation is a reverse of the above. I drilled out both the rivets below the instrument binnacle and replaced with self tappers, much easier for future access. The leather needs peeling back behind the rivets to avoid any mess during drilling then re-gluing afterwards.
I have included a number of pictures which should be self explanatory. Ill be happy to add any clarifications and I’m sure Jason will add his part shortly.
Attachments
-
 IMG_1682.JPG81.3 KB · Views: 3,191
 -
 IMG_1684.JPG59.3 KB · Views: 3,001
 -
 IMG_1683.JPG47.3 KB · Views: 3,014
 -
 IMG_1591.JPG84.7 KB · Views: 2,939
 -
 IMG_1611.JPG70 KB · Views: 2,994
 -
 IMG_1662.JPG49.4 KB · Views: 2,932
 -
 IMG_1665.JPG56.8 KB · Views: 2,929
 -
 IMG_1681.JPG76.4 KB · Views: 3,595
 -
 IMG_1689.JPG43.4 KB · Views: 2,843
 -
 IMG_1739.JPG77.2 KB · Views: 2,956
 -
 IMG_1692.JPG65.9 KB · Views: 2,962
 -
 IMG_1671.JPG63.1 KB · Views: 2,864