I've managed to open my door onto the side wall of my house and taken a small chunk of pain off the door edge. I've seen this stuff: http://www.chipex.co.uk/ra/?utm_expid=35337439-16.oweEKOZiQ3iqEPGTSC-Igg.1 and wondered if anyone has used it/had any experience? It seems good from the videos & feedbacks etc, but always good to get a forum's opinion on things like this.
Club Scuderia
-
Please take a minute to read this thread about our recent server issues and forum platform Switch
You are using an out of date browser. It may not display this or other websites correctly.
You should upgrade or use an alternative browser.
You should upgrade or use an alternative browser.
Chipex Paint/chip repair
- Thread starter 348Marky
- Start date
One thing I learned from a pro is to warm the paint stick in hot water before using, makes a huge difference. I have bought chipex but tbh it's no different to buying any paint stick and building it up in lots of thin coats
That's interesting, as it doesn't appear to be a paint stick they're selling. It seems to be a small pot of paint, along with the 'blending' solution etc. I've tried paint sticks in the past and they've been rubbish, frankly. I was hoping this would be a better bet? Seems a good tip to warm it first though, thanks.
F355GTS
Shocking waste of good kevlar - The Ferrari Enzo
That's interesting, as it doesn't appear to be a paint stick they're selling. It seems to be a small pot of paint, along with the 'blending' solution etc. I've tried paint sticks in the past and they've been rubbish, frankly. I was hoping this would be a better bet? Seems a good tip to warm it first though, thanks.
It's a small pot of paint with a separate sponge paint stick, the 'blending solution' is a mild thinners. tbh It's not really any different to a carefully applied paint stick
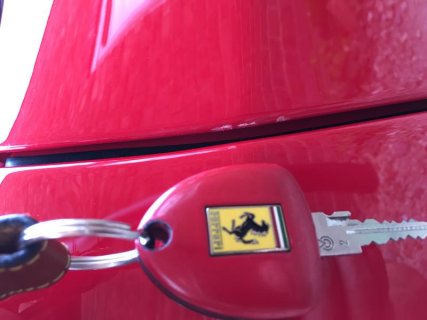
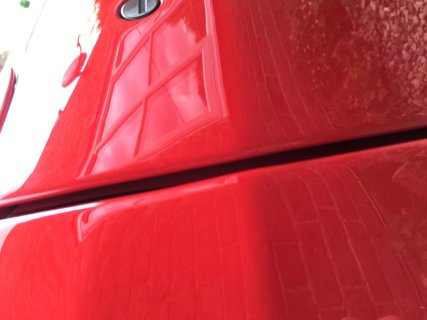
Ok, bought the kit & thought it reasonable value for £27 inc delivery. Really pleased with the result, can't really see it up close, let alone from a few feet back.
Before & after pics (sorry if the quality is rubbish, used the iPhone):
Before:

(Key held up for scale)
After:

Sorry for the photo orientation! Still can't get to grips with rotating iPhone photos!!
Before & after pics (sorry if the quality is rubbish, used the iPhone):
Before:

(Key held up for scale)
After:

Sorry for the photo orientation! Still can't get to grips with rotating iPhone photos!!
Hi,
I posted a link in the opening post here....it was all via there, but manually inputted my colour (rosso 322) instead of putting my car reg details. I bought the smallest of the 3 kit sizes they do. There was also a discount code popped up for free p&p and £2.50 off, meaning I paid £26.50.
I'm pleased with the results & would happily try it on any stone chips I pick up.
Last edited:
achaddy
Active member
I have bought and used this kit. One thing I liked about it is it is a 1 coat paint mix so no dabbing base colour and then clear on top. Never thought it user friendly when trying to touch in chips.
It's also not too expensive against other paint stick options. My Audi 2 coat touch up kit cost £20 and that's just 2 tubes of paint with a brush big enough to paint the whole car.
As for the results I think it's all about practice. The theory is good and while I haven't quite mastered their method you can always build it up, flat it back slight and polish.
From my experience I find I always seem to wash the paint out of the chip when using the blend in solution.
I agree with you about technique. The first time I tried it I seemed to wash the paint straight out, but figured I hadn't left it long enough. Started over again & left it a bit longer, until the paint was tacky dry, then used the solution. I felt the trick was not to apply any/too much pressure with the solution. It does say in the instructions to let it do the work for you. Once I'd finished that, used the polish they supply in the kit (which appears to be similar to T-cut etc) and it bought it up well. I used my Razeglaze 55 over the top & job done!
I've also since used the kit on a couple of scratches under my bumper after a small conflict with a speed hump. I wasn't too worried about the finish as you can't see it really, even when getting down on the floor and looking, but I'm really pleased with that result too.
I've also since used the kit on a couple of scratches under my bumper after a small conflict with a speed hump. I wasn't too worried about the finish as you can't see it really, even when getting down on the floor and looking, but I'm really pleased with that result too.
dave964
New member
And how about the colour match? I bought an aerosol from Halfords and watched carefully as the girl weighed out the various colours to make up the required shade only to fin on use that the shade wasnt a match. It seems that there are several rosso corsas.
I had Rosso Corsa mixed up by Halfords - using the correct code - and it was perfect.
I have chipex for my current car, and it's also an excellent match - but obviously you need to be choosing the right colour in the first place.
And how about the colour match? I bought an aerosol from Halfords and watched carefully as the girl weighed out the various colours to make up the required shade only to fin on use that the shade wasnt a match. It seems that there are several rosso corsas.
You should have a sticker in the luggage space with a paint code on it. More than 1 rosso corsa etc
