What's new
Club Scuderia

This is a sample guest message. Register a free account today to become a member! Once signed in, you'll be able to participate on this site by adding your own topics and posts, as well as connect with other members through your own private inbox!

  • Please take a minute to read this thread about our recent server issues and forum platform Switch

Ferrari 308 GTB QV Sales refurb thread 2014

WalkerSport

New member
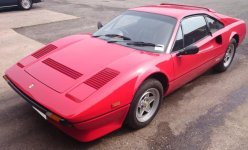
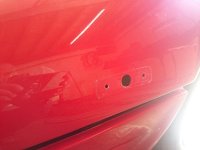
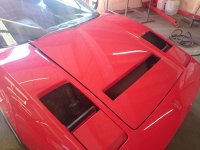
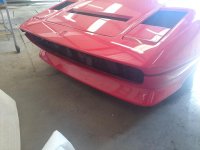
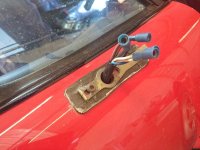
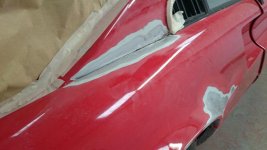
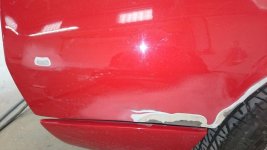
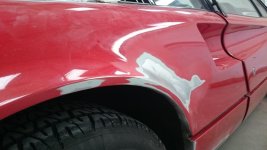
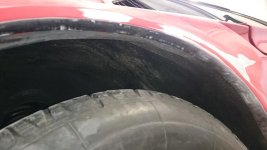
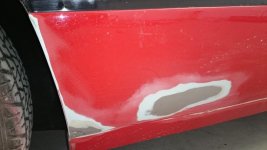
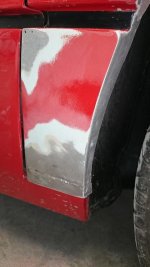
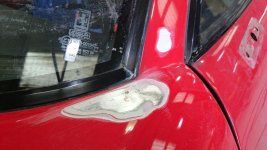
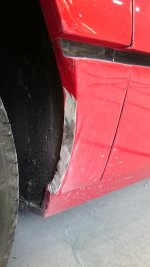
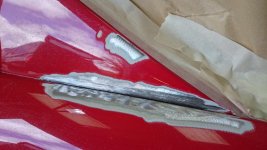
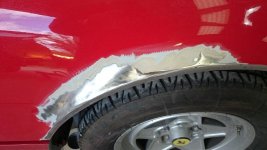
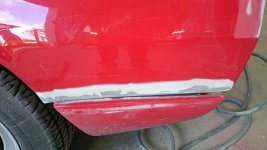
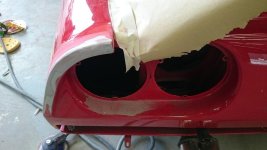
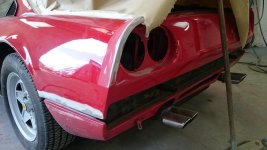
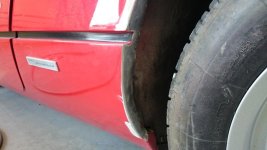
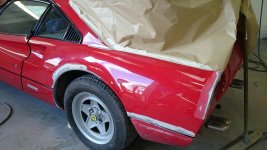
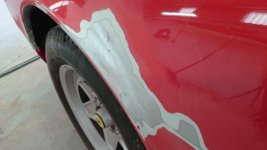
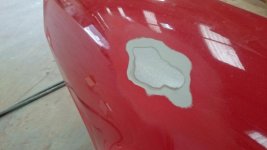
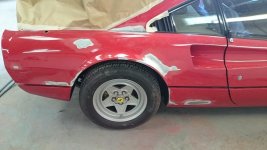
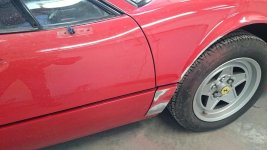
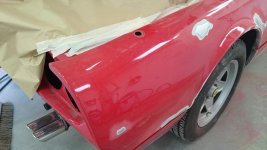
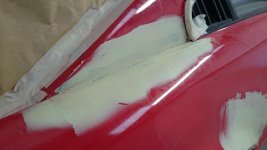
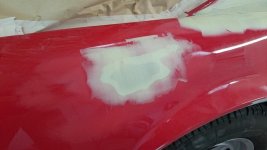
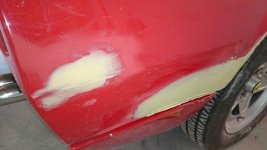
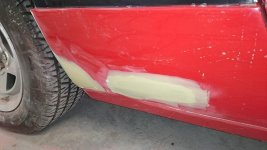
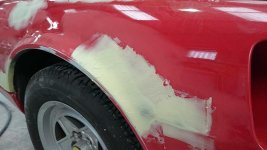
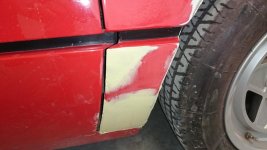
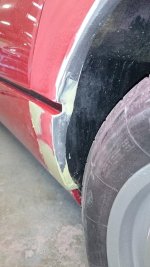
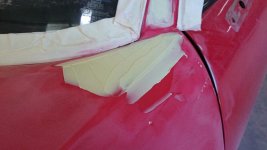
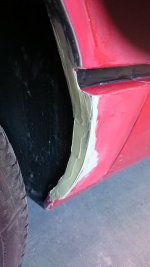
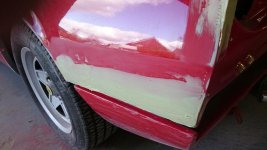
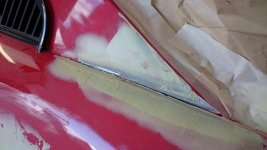
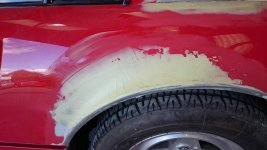
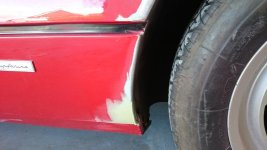
A lovely little 308 GTB QV, cracking little car, mechanically she is lovely - minor cam belt service, tensioners, anti roll bar bushes etc but nothing major, her interior will be covered later on on this thread - very straight forward minor works, but first of all is the body, she does not have any corrosion but the previous repaint (probably around 8 - 9 years ago) was good but not the best, the primer had not fully dried before the paint was applied.

The paintwork will be sorted first.
 

Attachments

  • DSC_0078.jpg
    DSC_0078.jpg
    59.2 KB · Views: 742
While were painting most of the car including the bonnet its best to remove and repaint the grills as well.
 

Attachments

  • DSC_0082.jpg
    DSC_0082.jpg
    53.9 KB · Views: 618
Nothing sinester in here, everything just the way she should be.
 

Attachments

  • DSC_0086.jpg
    DSC_0086.jpg
    49.6 KB · Views: 661
  • DSC_0087.jpg
    DSC_0087.jpg
    45.5 KB · Views: 685
Tim
Can you take a few pics of the rear light removal when you get to it? I've tried to do mine a couple of times and given up (I don't have much patience).
1/ I cannot find the right tool / box spanner
2/ I'm scared of pulling the wiring apart.
Thanks in advance.
 
Hi Graham

Page 11 and 15 of this thread will show what you need to know.

http://www.clubscuderia.co.uk/forum...thread&highlight=208+turbo+restoration+thread

The light units are held in by 3 nuts, the light unit has exceptionally long fixed bolts at 2 o'clock, 6 o'clock and 10 o'clock, If memory serves (which can be a bit hazy at times) the nuts are 7mm. Unless you have a very long socket you will struggle with a little spanner without removing the carpet, once you have managed 1/2 a turn they will finger spin all the way off (as long as they are not corroded).

Good luck!

T.
 
Thanks Tim. So do the electrical connectors just pull apart? This bit makes me most nervous.
Looking forward to seeing this this 308 thread develop btw :thumbsup:
 
The back of the light unit has two clips at the top and two clips at the bottom, you just spread these apart at the top and gently pull, once the top is out you then repeat the bottom, its nothing to be afraid of, they where designed to be removed regulary to change the bulbs, I have never broken one or seen a broken one from removing the bulb holder.

T.
 
Ok great. I'm sure I'm fussing over nothing and will feel silly once done.
Keep us posted on this restoration thread. Love the 308 and really enjoy seeing new life breathed
Into them on these threads.
Cheers :thumbsup:
 
No corrosion really, you can see some previous repairs to the base of the front wings under the swage line, but its nice not to deal with filler - these have been lead loaded so reprofiling will be easy.
 

Attachments

  • DSC_0089.jpg
    DSC_0089.jpg
    36.9 KB · Views: 257
  • DSC_0090.jpg
    DSC_0090.jpg
    35.4 KB · Views: 255
  • DSC_0091.jpg
    DSC_0091.jpg
    37.9 KB · Views: 257
  • DSC_0092.jpg
    DSC_0092.jpg
    36.2 KB · Views: 250
  • DSC_0093.jpg
    DSC_0093.jpg
    34.3 KB · Views: 250
  • DSC_0094.jpg
    DSC_0094.jpg
    35.9 KB · Views: 252
Continued...
 

Attachments

  • DSC_0095.jpg
    DSC_0095.jpg
    50.6 KB · Views: 252
  • DSC_0096.jpg
    DSC_0096.jpg
    38.1 KB · Views: 256
  • DSC_0097.jpg
    DSC_0097.jpg
    49 KB · Views: 259
  • DSC_0098.jpg
    DSC_0098.jpg
    42.2 KB · Views: 257
  • DSC_0099.jpg
    DSC_0099.jpg
    43.7 KB · Views: 254
The rear N/S quarter profile is a little too rounded, so we will correct that, - once the paint has been taken back its easy to see why, a previous corrosion repair, The lead loading requires a little bit of building up and correcting.
 

Attachments

  • DSC_0100.jpg
    DSC_0100.jpg
    36.5 KB · Views: 252
  • DSC_0101.jpg
    DSC_0101.jpg
    47.7 KB · Views: 249
More.
 

Attachments

  • DSC_0102.jpg
    DSC_0102.jpg
    38 KB · Views: 248
  • DSC_0103.jpg
    DSC_0103.jpg
    52.2 KB · Views: 245
  • DSC_0104.jpg
    DSC_0104.jpg
    32.6 KB · Views: 253
  • DSC_0105.jpg
    DSC_0105.jpg
    27.4 KB · Views: 245
  • DSC_0106.jpg
    DSC_0106.jpg
    43.8 KB · Views: 249
  • DSC_0107.jpg
    DSC_0107.jpg
    47.5 KB · Views: 245
  • DSC_0108.jpg
    DSC_0108.jpg
    40.5 KB · Views: 249
Cracking really, no corrosion this will be a very straight forward refurbishment, we will not paint the roof, although this would be the correct way, the extra costs of removing the glass and trims cannot be justified so the paint will be blended on the A pillars and buttresses.

Further progress to follow.
 
Last edited:
The reprofile work can begin.
 

Attachments

  • DSC_0113.jpg
    DSC_0113.jpg
    32.6 KB · Views: 236
  • DSC_0114.jpg
    DSC_0114.jpg
    30.7 KB · Views: 231
  • DSC_0115.jpg
    DSC_0115.jpg
    37 KB · Views: 241
  • DSC_0116.jpg
    DSC_0116.jpg
    41.3 KB · Views: 236
  • DSC_0117.jpg
    DSC_0117.jpg
    39.1 KB · Views: 238
Next...
 

Attachments

  • DSC_0118.jpg
    DSC_0118.jpg
    40.9 KB · Views: 230
  • DSC_0119.jpg
    DSC_0119.jpg
    50.2 KB · Views: 231
  • DSC_0120.jpg
    DSC_0120.jpg
    31.5 KB · Views: 235
  • DSC_0121.jpg
    DSC_0121.jpg
    32.4 KB · Views: 233
  • DSC_0123.jpg
    DSC_0123.jpg
    41.3 KB · Views: 232
  • DSC_0124.jpg
    DSC_0124.jpg
    41.2 KB · Views: 231
  • DSC_0125.jpg
    DSC_0125.jpg
    41.5 KB · Views: 234
  • DSC_0126.jpg
    DSC_0126.jpg
    37.5 KB · Views: 231
Top